How to Seal Grout in 4 Steps: DIY Guide for Beginners
Since moving into our fixer upper three years ago, we’ve done quite a bit of tile work (and by “we” I mean my hubby)! The final step to finishing your tile floors is sealing the grout. But it’s a step that can easily be overlooked when you’re ready to be done.
We made this mistake with the grout in our laundry room and we definitely regret it. What used to be a light gray grout with a concrete-look tile now looks like black grout and is very difficult to clean. We didn’t make the same mistake on our bathroom!
Learning how to seal grout is a simple process and definitely worth the time, effort, and money. Before diving into how to seal grout, let’s learn more about it.
This post contains affiliate links for your shopping convenience. See my disclosure policy here.
All About Grout
Grout is a porous material that absorbs the different chemicals and liquids it comes in contact with. When this happens, grout can be very difficult to clean and maintain due to its porous nature.
Grout sealing is done to help protect grout from absorbing unwanted chemicals or cleaners into it. This will allow for easier cleaning of the grout because it prevents the chemicals from being absorbed into it. Learning how to seal grout is imperative to a lasting finish.
Grout comes in a variety of different colors and is usually made from a mixture of cement, sand, and polymers. Grout itself does not have the best aesthetic value because it shows grime very easily due to its porous nature.
In addition to this, most grout contains crystalline silica which is known to cause cancer. Therefore, sealing grout will help reduce the amount of harmful chemicals that are potentially damaging to humans.

How to Seal Tile Grout
To seal your grout, you will want to purchase a clear grout sealer from your local hardware store. You can find these products in the same area as the tile and grout. We used this one from Home Depot.
Make sure you apply the grout sealer to your grout according to the directions on your specific product. Each product is a little different. You can use a small brush, sponge, or clean cloth to apply it evenly over the grout.
Here are the supplies we used as well as the steps we took to seal our grout using this sealer:
How to Seal Grout
Supplies:
Grout sealer of your choice
Paint brush
Towels
- Sweep the floors to get loose dirt and debris up.
- Clean floors thoroughly with soap and water, allowing it to dry fully.
- Apply the grout sealer evenly over the entire surface of the floor using a brush and wipe up any excess sealer. Allow it to dry completely.
- Repeat with a second coat. Allow them to dry and then enjoy your new floors!
Do you really need two coats?
You will most likely want to apply the sealer twice because you will most likely miss a spot or two on your first coating. Once this is done, you can let it dry and harden completely before using the grout again.
This process must be repeated occasionally depending on how often you use your shower or tile.
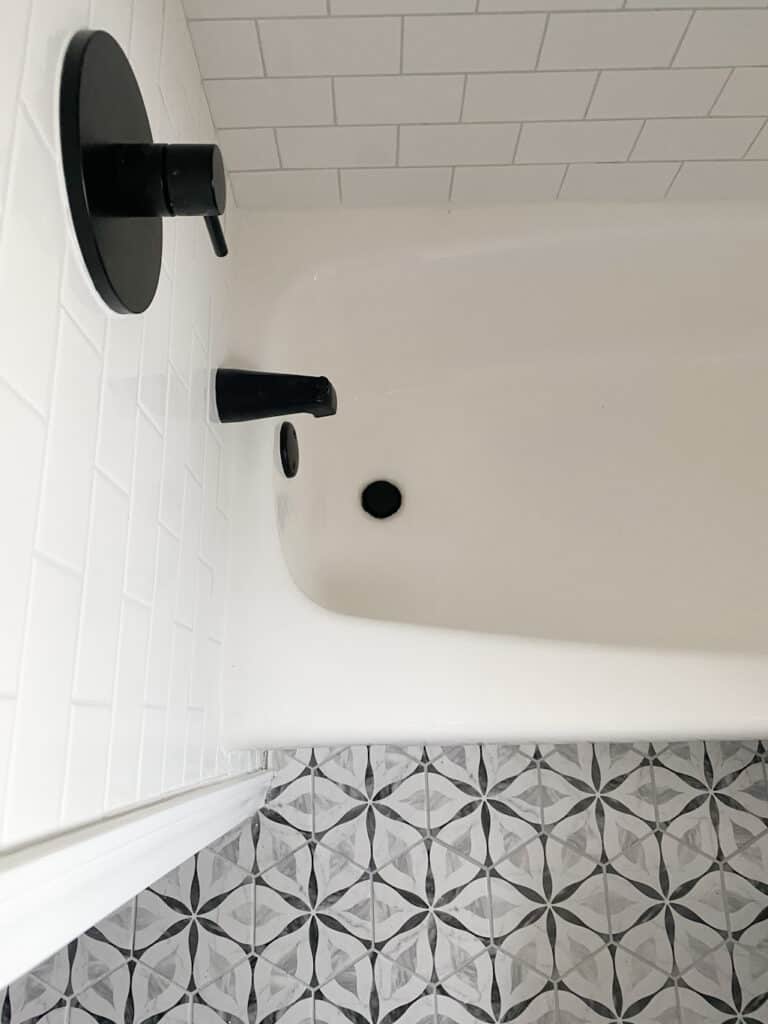
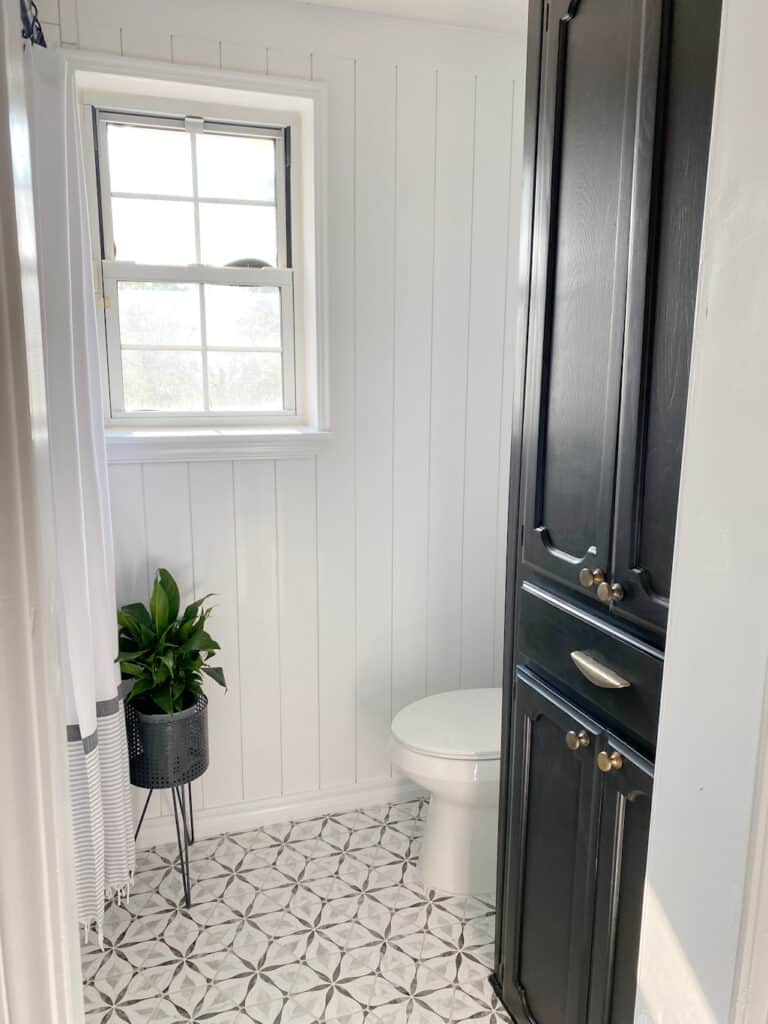
How to Seal Shower Tile Walls
The process for sealing shower tile walls is much the same. We sealed the subway tile in our bathroom using a similar method below. We didn’t have to go through all of the steps since it was a new tile job so it will depend if your tile is existing or a new job.
Sealing shower tile begins with cleaning it thoroughly. You want to remove any dirt or soap scum that gets trapped in the grout lines, which will become sealed if you don’t clean them out first.
Next, take a damp sponge and mix baking soda into a slurry. Scrub the shower tiles from top to bottom with this mixture, then rinse it away with hot water.
To seal the grout, you can use a clear acrylic-latex based grout sealer from your local hardware store. You want to apply the sealer over all of the tile evenly, then let it dry and harden before using the shower again.
This process must be done on an annual basis to keep the shower tile sealed properly. For more on how to seal grout, check out this article by Bob Vila.
Curious about how we painted our vertical shiplap? Check out these 5 tips!
Grout FAQs
Do you have to seal grout?
No, you do not need to seal grout. Sealing grout is simply something that helps protect it and makes it easier to clean over time.
How often should you seal grout?
The process should be repeated on an annual basis to keep your grout protected and looking its best. If you don’t use your shower or tile very often, then only do the sealing once every few years.
How long does grout take to dry before sealing it?
Grout should take around 24 hours to fully dry before you attempt to seal it. This is because the grout needs time to completely absorb the grout sealing product so that it adheres properly and can be cleaned thoroughly.
Ensure that your grout is completely dry before sealing it, as applying a sealer over damp grouted tiles will lead to a poor seal and messy grout lines.
After sealing grout, how long do you have to wait before taking a shower?
This depends on what kind of sealer you are using. Acrylic Latex Based Grout Sealers only need an hour to dry while Oil Based Polyurethane Grout Sealers will need 12 hours or more before your bathroom can be used again. Silicone Based Grout Sealers are typically safe to use within 6 hours.
Can you paint over sealed grout?
Yes, you can paint over sealed grout with latex or acrylic based paints. It’s best to wait until the sealer has completely dried before attempting this though.
What is the best way to clean sealed grout?
To clean sealed grout, simply use a damp sponge and dish soap to scrub the grout. You can also use a toothbrush or find specific cleaners designed for grouted tiles as well.
Make sure that any cleaning product is free of bleach and acid though as those will damage your grout over time.
Is grout waterproof?
In short, no. Grout can absorb water and will become dirty if it comes into contact with water from the shower head or a spill on the floor.
You should seal your grout regularly to keep it looking clean and free of mildew because unsealed grout absorbs dirt and soap scum, which will eventually cause discoloration.
When you seal grout, you can prevent it from becoming discolored or stained. You’ll also be able to keep the floor looking newer for longer by preventing mold and mildew growth in your space.
Learning how to seal grout and using the process on your tile floors will ensure beautiful floors for a long time and is definitely worth the time, effort, and money!