How to Install a Barn Door Like a Pro
Choosing to install a barn door is a great way for homeowners to add extra style and storage in their homes. Barn doors come in many different styles, but often have rustic charm that goes well with just about any interior design scheme.
Made popular by the farmhouse movement, installing barn doors is also an easy project for both homeowners looking to do it themselves or hire out the job.
This post contains affiliate links for your shopping convenience. See my disclosure policy here.
Barn Door Installation Cost
Paying someone to install barn doors for you can range anywhere from $200 to $1,000 depending on the scope of the project so doing it yourself will save money and it’s fairly easy with the right tools!
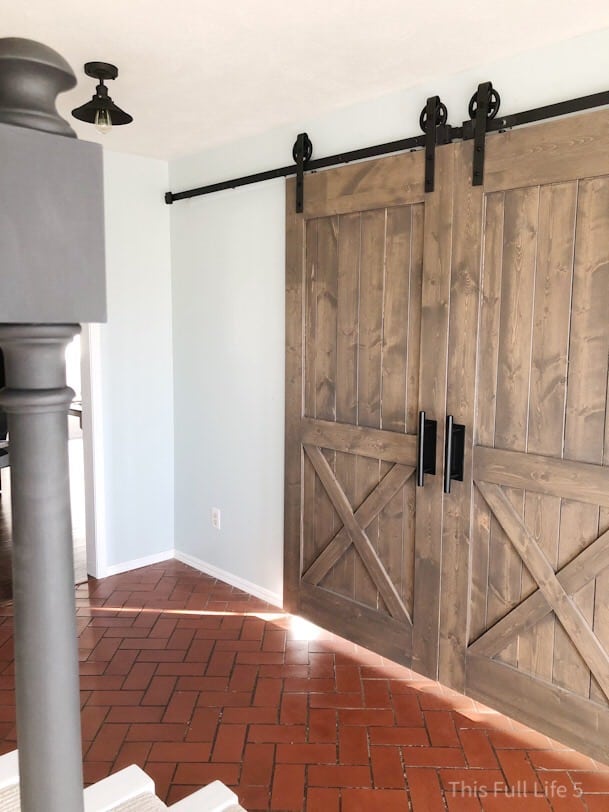
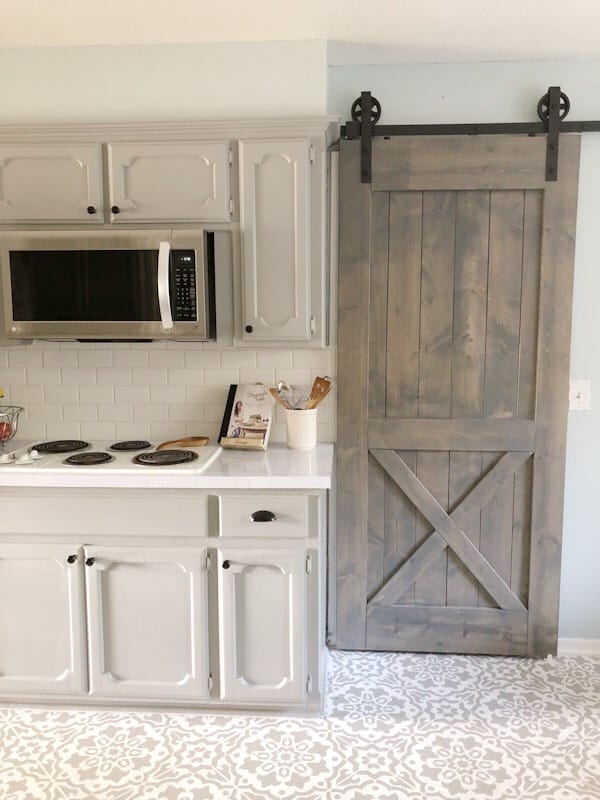
We’ve hung double barn doors in our entryway and another barn door in our kitchen and people always ask us what the process is like.
So today I’m going to share a step-by-step tutorial and we’ve also made a video if you’re visual like me!
Barn Door Wall Decor Ideas
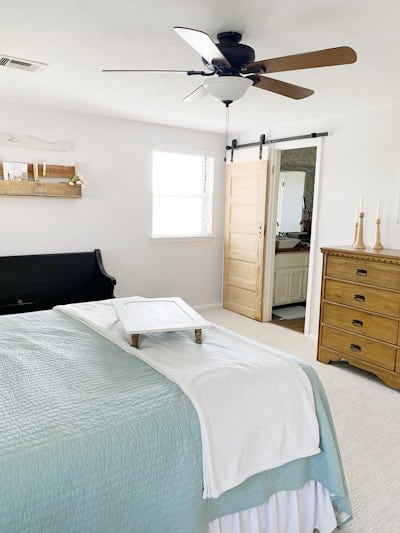
We wanted to install a barn door to replace the door leading into our bathroom. Our room has a cottage farmhouse vintage feel so I didn’t want a new door and I wanted it to serve as a focal point and feel more like wall decor.
I turned to Facebook Marketplace and found an antique door for $35. One side had already been stripped but the other side was chippy white paint. Both sides were really cool and perfect for what we were going for!
The guy told me it was 3 feet by 7 feet but he was off on his measurements. When we got the door home it was too short so we had to add a section on to make it long enough.
At first, I was bummed because I thought I would have to paint both sides since the added piece didn’t match the door. But then I decided to just paint a strip of white on the top where the new piece was and see how it looked.
We ended up loving the look! Dipped furniture is really popular right now and so I took that idea and applied it to the door and it worked well! Now it was ready to hang!
How to Install a Barn Door Over Existing Trim
Installing barn door hardware isn’t difficult, but it can be a little different from installing other types of hardware. The trick is to understand the logistics involved before you get started with the project.
All hardware is a little different so you will need to refer to the instructions provided for measurements. If you are installing a barn door over existing trim, we recommend installing a header first.

How to Install a Barn Door Header
You can mount the rail directly to the wall, but we recommend using a 1×2 header for two reasons. First, it gives extra clearance so the bolts or hardware on the door don’t hit your trim.

Second, it gives you more points to mount to the studs in the wall. Then you don’t have to worry as much about the lug bolts on the rail hitting studs, they can just go straight into the 1X2.
Start by measuring the length of your rail, this is how long you need to cut the header. If you’re planning on painting or staining your header, you’ll want to do that before attaching the header to the wall.
Line the header up with the end of your trim on the side the door will be closed on. Locate the studs in the wall above your door and using screws attach the header directly above your existing trim. Now you’re ready to mount the rail! Again, refer to your specific hardware on how to mount the railing.
PRO TIP: When mounting both the 1X2 and the rail be sure to use a level. The door will roll open or closed on its own if it isn’t level.
After mounting the rail securely to the wall, you will want to add the bumpers on each end by sliding them on and tightening the hex bolts. Now you can move to your door.
SHOP BARN DOORS ON AMAZON

Preparing to Install a Barn Door
Check the hardware directions on where and how to drill the bolt holes that attach the wheel hardware to the door. Use a carpenter’s square to ensure accuracy. The wheels will hang towards the back of the door.
Drill the holes with the appropriate size drill bit and tighten the bolts. If it’s provided, attach the “anti-jump” bumper to the top of the door so it won’t accidentally jump off the rail. Now you’re ready to hang your door!
Hang Your Barn Door
Carry your door inside and gently hang it on the rail and position the “anti-jump” bumper so it won’t come off. Make sure the door is hanging straight and then mount the door guide onto the floor, to help guide the door on the bottom.
Congratulations, you’ve just installed a barn door! Step back and admire your work!
How to Install Double Barn Doors
Installing double barn doors works much the same as a single, you just have a longer rail. You will need to measure the rail to get the length for your header.
This time instead of lining it up against the trim, it will need to be centered so it hangs over evenly on both sides of the opening.
As mentioned above, you will locate the studs to screw the header into directly on top of the trim (you can adjust this if your doors are taller).
Attach the rail to the header following the directions for your hardware. Refer to previous steps for installing the doors.

Install a Barn Door FAQs
How much does it cost to install barn doors?
According to Home Advisor, the average cost of paying someone to install barn doors is around $600. You’ll pay $200 on the low end and as much as $1,000 on the high end.
Do you remove trim when installing a barn door?
Not necessarily. You can install a header over the trim of your door to allow for clearance and this way you don’t have to remove the trim. If you don’t want to use a header you will need to remove the trim.
Can you hang a barn door on drywall?
Yes, but we recommend using a header and attaching it to the studs.
Do you need a header for a barn door?
Not necessarily, but it helps if you’re hanging a barn door on drywall and it’s needed if you’re wanting to keep your existing trim in place so there’s enough clearance for the door to open and close.