How to Make a DIY Painted Doormat That Looks Store-Bought
It’s summer and, if you’re like me, that comes with an urge to freshen up your home decor! This DIY painted doormat was really easy and I was able to customize it to look like and say what I wanted it to. Plus it was budget-friendly which is always a plus in my book!

RELATED POST: 12 DIY Doormat Ideas You’ll Want to Make This Weekend
This post contains affiliate links for your shopping convenience. See my disclosure policy here.
DIY Doormat Step-by-Step:
Contents
What you need:
Blank doormat
Stencil (optional)
Painter’s tape
Paint
Assorted brushes
I started by purchasing my blank doormat. It was on sale at Target for $8.99! Then I made a run to Hobby Lobby and purchased a stencil. I already had the tape, paint, and brushes needed for the project, but you could also find these at any arts and crafts store like Hobby Lobby or Michaels.
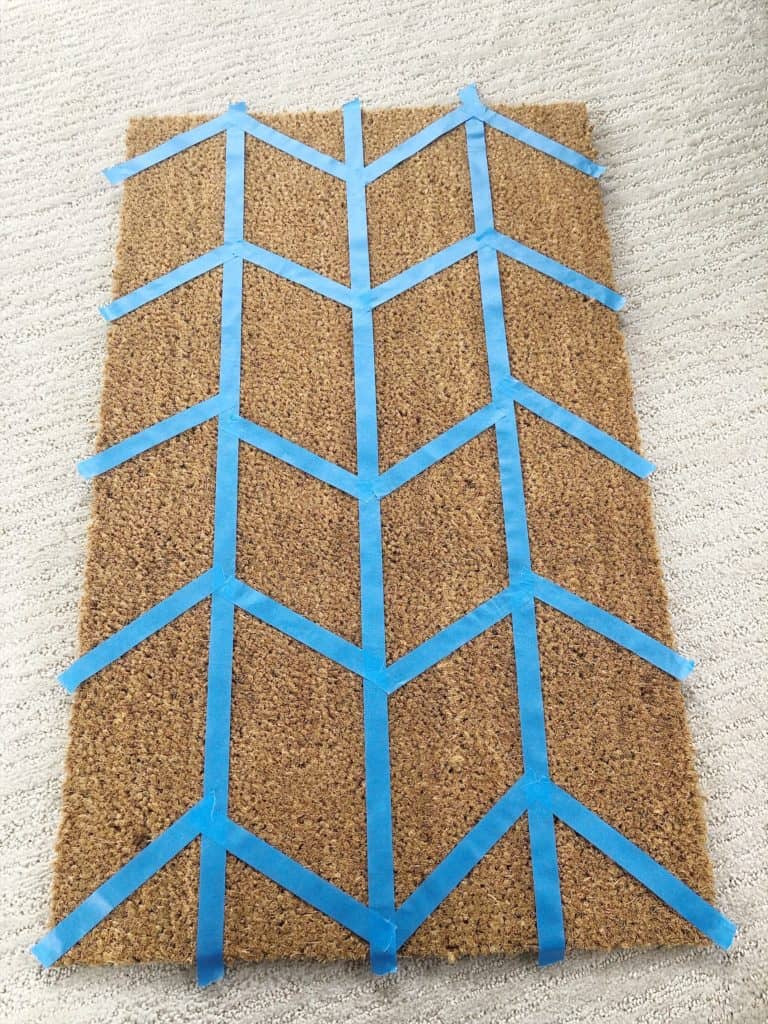
1. Tape the Doormat
I put a piece of tape down the middle of the rug. Then from the edge to the halfway point I measured halfway again and place another piece of tape. I repeated this on the other side. This will give you four equal sections running the length of the mat.

Next, starting on the far left section, I measured halfway down the width of the rug and placed a diagonal piece of tape. Then I placed the tape at either end running from edge to edge.
From there I was able to measure halfway between the middle piece the end pieces to tape off the final sections. This should leave you with four equal sections and two triangular sections at either end.
Repeat this going in the opposite direction on the next section and so on until you have the whole mat taped off.
It should look like this:
RELATED POST: DIY Modern Address Sign
2. Paint the Pattern
Now you’re ready for the paint! I had some leftover black Krylon paint that I used for this project. I used an angled brush and applied the paint with strokes moving away from the tape so that the paint didn’t seep under the tape.
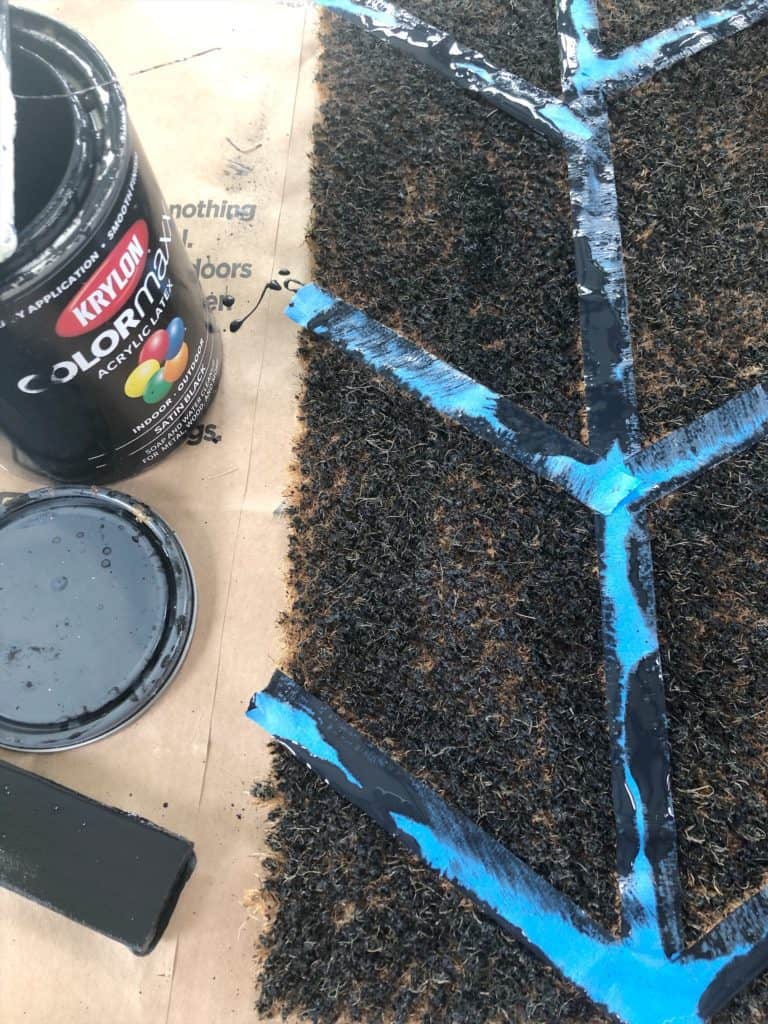
After each section has been painted, peel the tape off. Let the mat dry completely before applying a stencil.

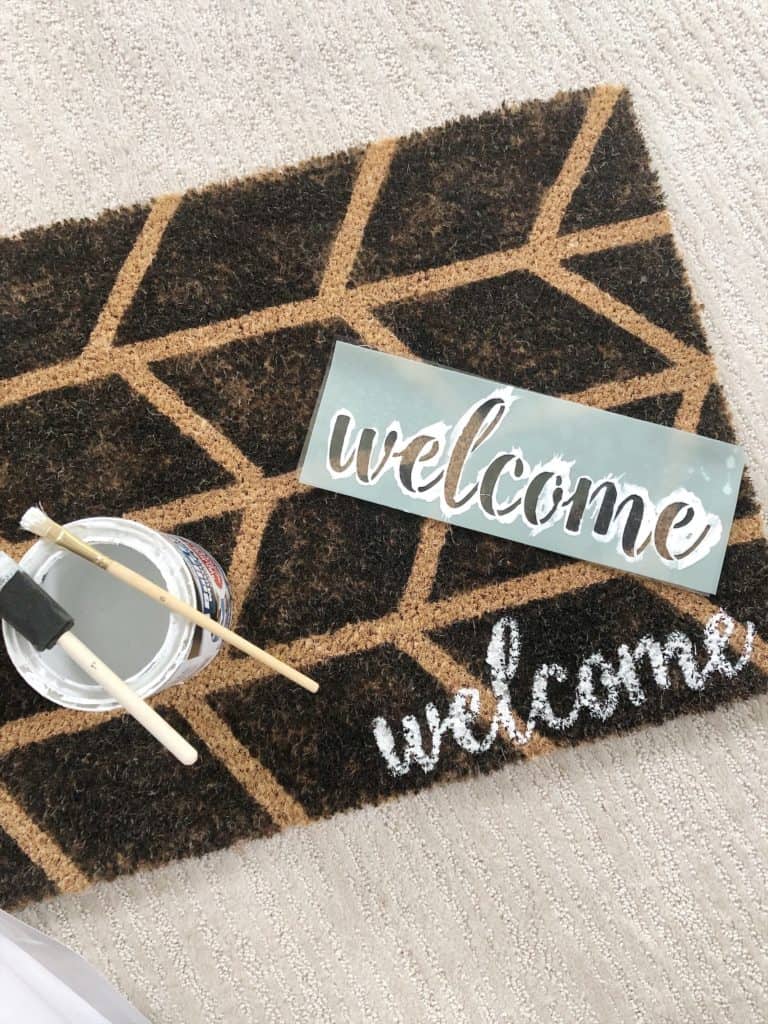
3. Apply the Stencil
Once the mat has dried, you can leave it or apply a word stencil. I purchased an adhesive “welcome” stencil to place on my mat. It was nice to have the adhesive because it helped to keep it in place! You can also tape it in place or use spray adhesive to get it to stay while you paint.
I used some white paint I had and used a small brush to paint. I had to go over it several times to get it to show up well, but I think it turned out nice!

Creating your own DIY painted doormat is such a simple way to add personality and charm to your front porch. Whether you keep it classic like this bold geometric design or personalize it with a seasonal message, this budget-friendly project is sure to make a welcoming first impression.
Don’t be afraid to experiment with different stencils, patterns, or colors to make it your own. Once you try it, you might find yourself making one for every season!
If you give this project a try, be sure to tag me—I’d love to see your creations!
Dori, how cool is your door mat. It turned out so cute. Love the welcome touch to the bottom. Your guest will want to stop and stare at it and ask where you found it. I love working with you on this challenge and excited for the next DIY challenge. Have a happy Mother’s Day!
Thanks so much Terrie! It was so fun to work together again!
Dori, your doormat is so cool! I am obsessed with arrows, so I am particularly drawn to your design. I really love the use of both black and white paint. Great job!
Thank you Kristen!! It was fun working together!
I love how it turned out Dori!!
Thank you Cate!
Love your door mat Dori. I feel it’s fits right in with the boho styles we see today. This was a lot of fun and I hope we can do this again soon.
Thank you Shanna! Me too!
Your mat turned out super cute! I love the pattern you created!
Thanks so much Dani!
What a great design, and a great way to welcome your guests to your home!
Thanks so much Patti!
I think your mat turned out great, I love it! Looking forward to joining you guys next month! Hugs!