Wood Paneling Makeover: Transform Dated Paneling into Board and Batten
Outdated wood paneling. Three out of the four houses we’ve owned have had this popular 60s and 70s material. For our current house, most of the paneling had been painted over, which doesn’t bother me because I like the added texture and character of the painted paneling.
RELATED POST: How to Paint Paneling Walls
But the paneling in our guest bath had been left untouched and with the updated finishes we chose it was not the look I wanted. Sheetrock is not something the hubby and I are great at and we really didn’t want to spend the money to hire someone so we came up with a different solution – board and batten wainscoting!
RELATED POST: How to Install Wainscoting: Different Methods and Types
This remodel was not in our immediate plans. But after getting the news that we had a busted sewer line that had to be replaced, we decided to spend a little extra and refinish the bathroom and laundry room since they were the spaces directly affected by the sewer line.
This post contains affiliate links for your convenience. See my disclosure policy here.
From Paneling to Board and Batten
Contents
I love the look of board and batten. In our previous home, we did a board and batten accent wall in our master bedroom. As I studied the paneling I thought about our options. It hit me that with a few modifications we could do it here, too.
The paneling only took up a third of the walls. The rest was covered in wallpaper that we had to texture over and paint. I thought the board and batten would really stand out with the marble tile floor we had settled on and give the space some character.
What you need:
Sandpaper
Base trim
Thin strips of wood (we used 2×1/4″)
Nail gun, nails
Caulk
Putty
Primer
Paint color of choice
Directions:
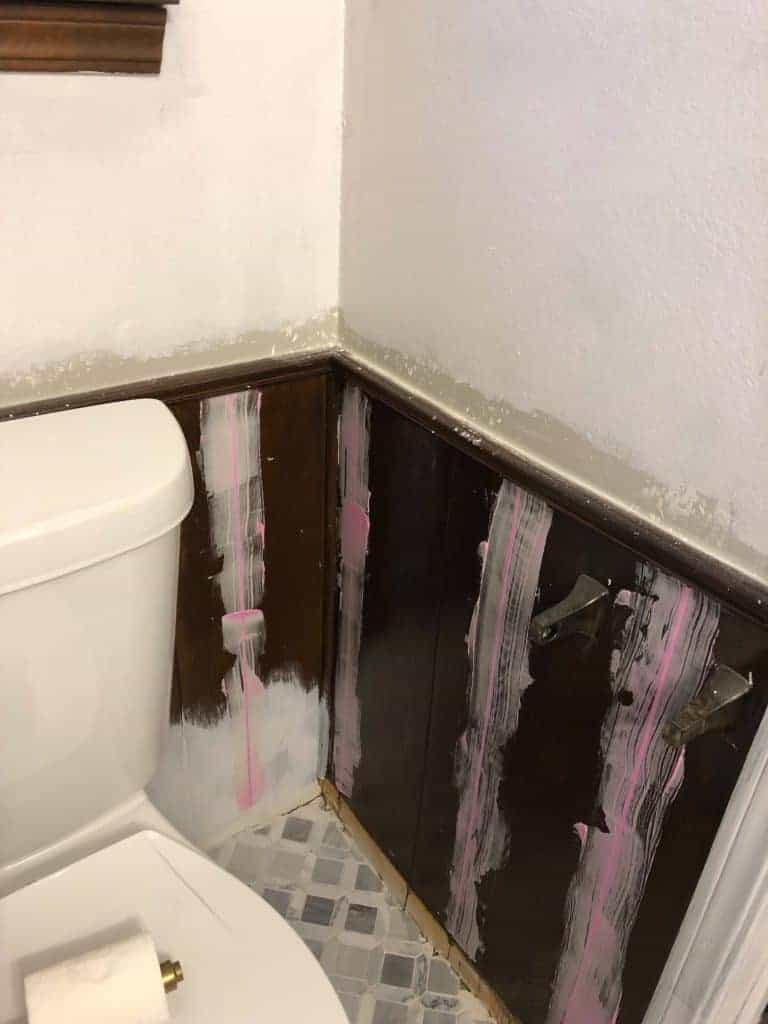
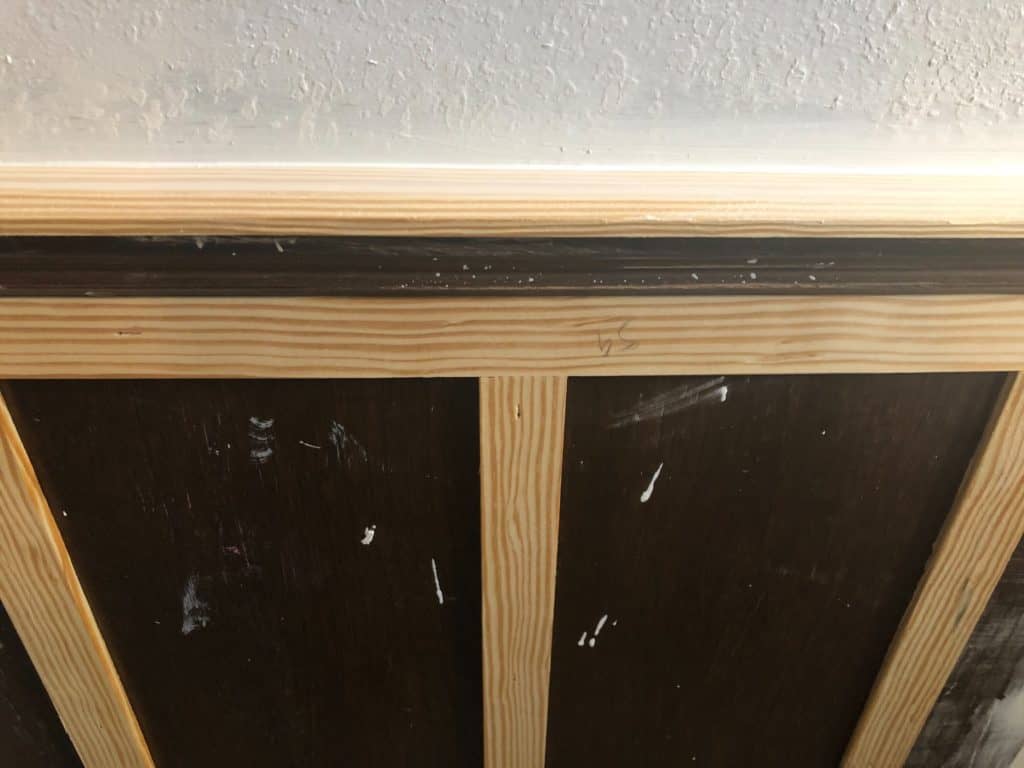
Step 1: Measure and Fill
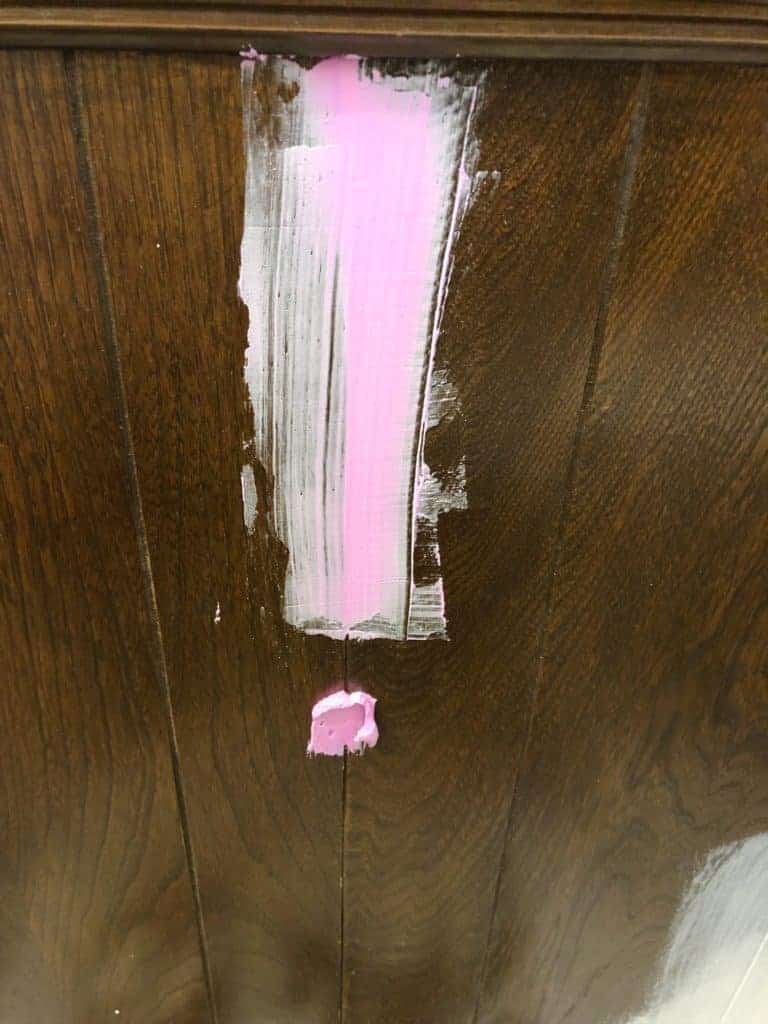
Start by measuring and marking the grooves. Fill in the grooves that will not be covered by wood with putty. Once it dries, you may have to fill it in a second time. For me, the first round of putty sunk into the groove some requiring a second coat.
The putty we used went on pink and turned white when it was dry which was pretty helpful!
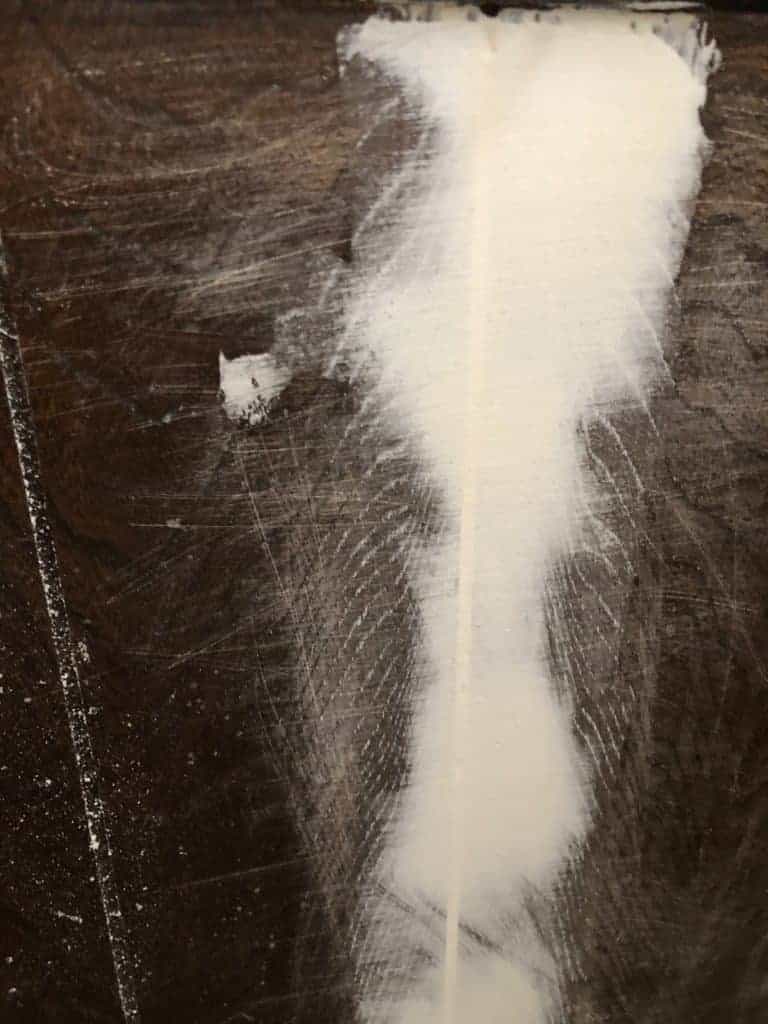
Step 2: Sand and Wipe
Once completely dry, sand putty down until smooth and even with the rest of the paneling. This gets messy and you’ll need to wipe down the surfaces before moving on.
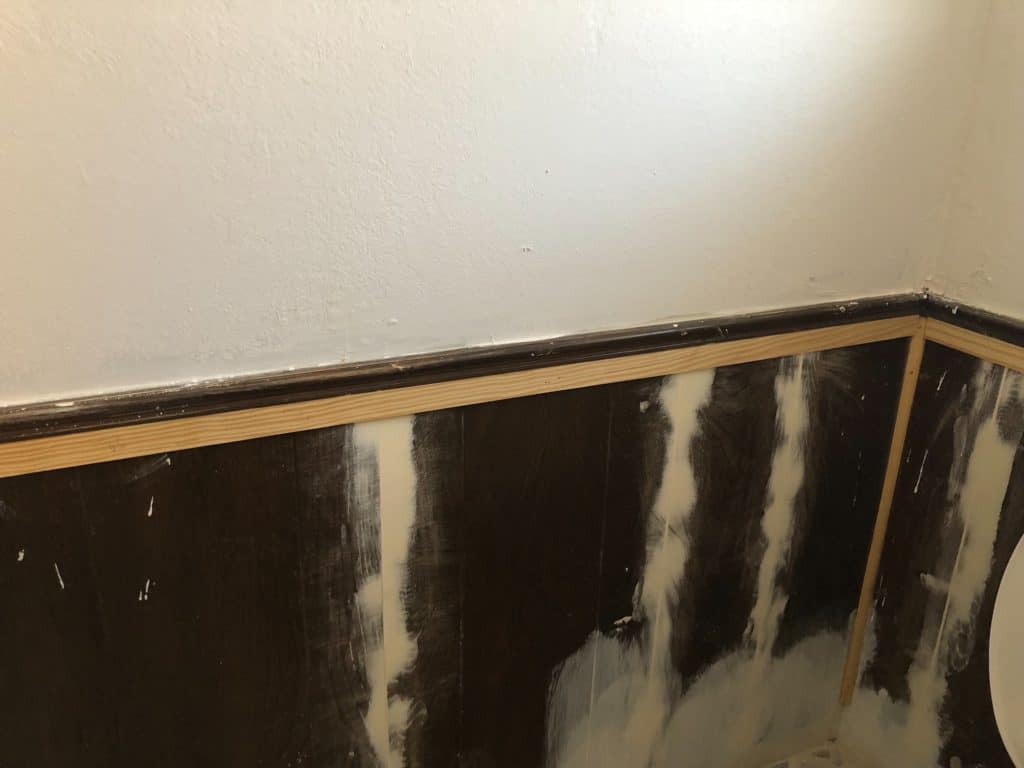
Step 3: Install Base Trim
Now you’re ready for your base trim. You may choose to reuse yours, but ours was almost 50 years old and disgusting. We replaced it with a new thicker trim.
Once you’ve measured your base trim, I suggest painting/staining before installing it. It will make life so much easier. My hubby painted it and then installed it around the room. Use putty to fill in the nail holes. Once dry, you can lightly sand and touch up with your paint or stain.
Step 4: Install Horizontal Trim
Now you’re ready for the thin pieces of trim. You will install this horizontally on top of the base trim and underneath the top decorative trim piece.
Cut, paint (wish I had done this first!), and use your nail gun to secure it to the wall. We also had to replace our corner trim because it had split and broken off.
Step 5: Install Vertical Trim
Using this same trim, measure the vertical length and cut the number of pieces needed to go around the paneling. Make sure they’re spaced evenly and covering the unfilled grooves. Attach with nail gun.

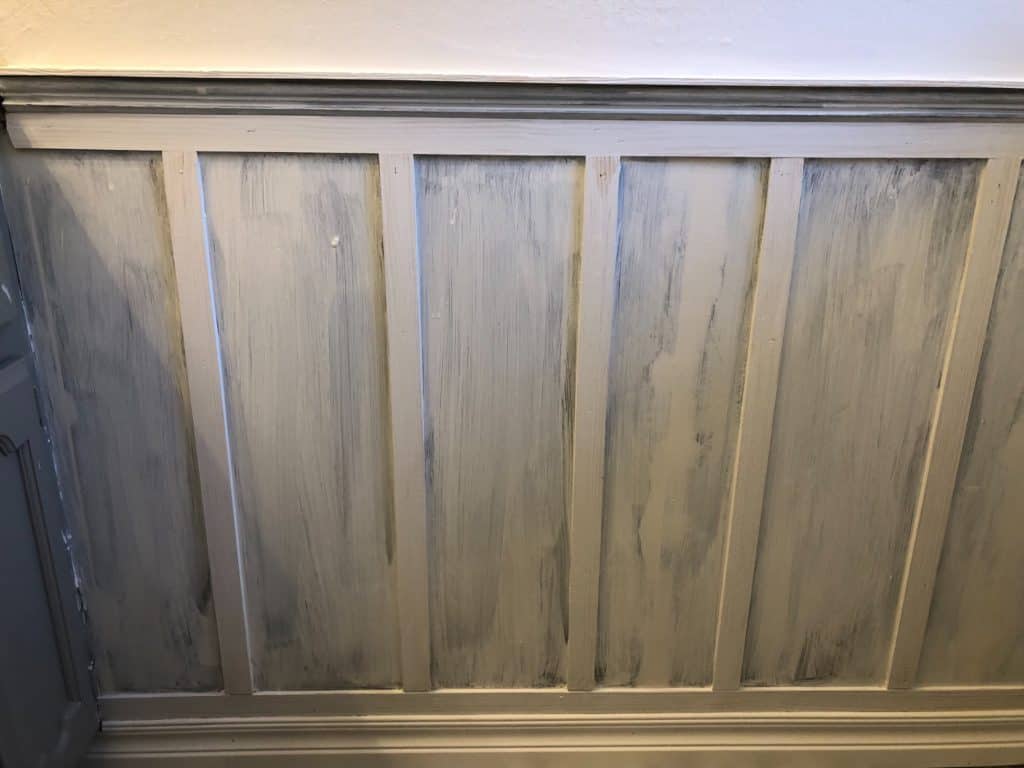
Step 6: Install Chair Rail
You’re almost there! For the last step, we used the same thin board but laid it flat on top of the decorative trim piece to create a small ledge. We attached it to the trim with the nail gun and voila!
Step 7: Finishing Touches
We filled in all of the holes with putty and caulked any gaps to give it a finished look. Then we painted over everything with primer first and then used Valspar’s Cabinet Enamel in white to complete the look. Here it is after the first coat of primer:
And here it is all finished! For an inexpensive and fairly easy update, it really made this bathroom stand out! The contrast against the marble tile is so pretty and it really brightens up this once dingy space.
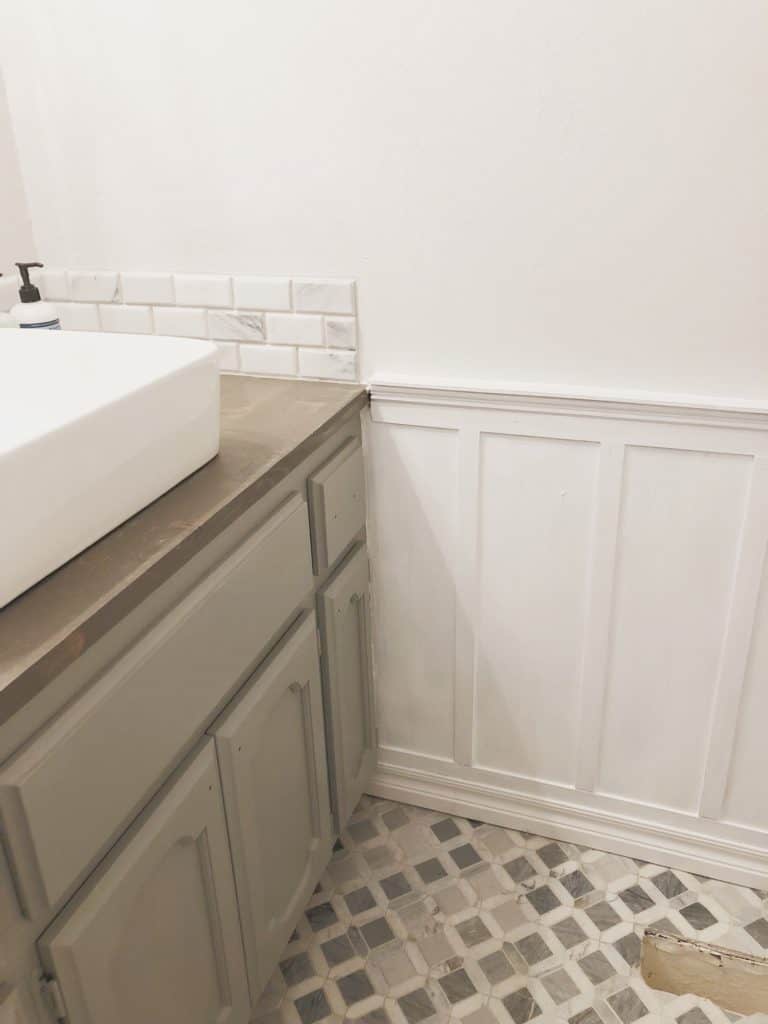
If you have old, outdated paneling and aren’t ready to rip it out and do sheetrock, I encourage you to give this option a try! No one will ever know that it used to be paneling!
Want to see the full bathroom reveal? See the bathroom makeover here!
You may also be interested in:
How to Tile Over Linoleum
Valspar Cabinet and Furniture Enamel Review
That turned out wonderful! Looks so pretty with the tile work you did.
Thanks so much!!
The destructive side of me would immediately start ripping it all down lol I never thought of working with the paneling instead of against it. Luckily i’m panel free in this home .
LOL! It was my first thought, too!
Oh my I love it! and want that tile too!
Thanks so much!!