Easy DIY Marble Countertops
Want designer countertops without the designer price? DIY marble countertops are the way to go!
Contents
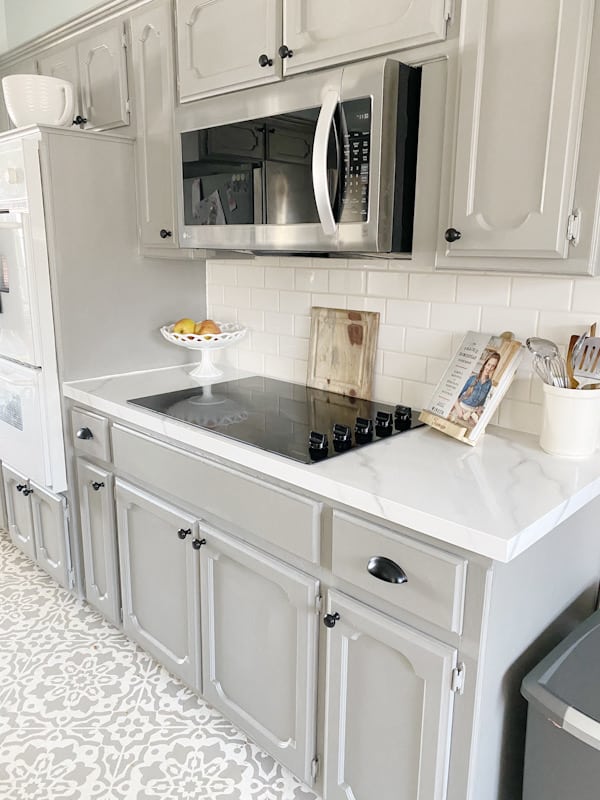
We recently gave our laminate countertops a makeover using an epoxy marble countertop kit. The process was simple and the impact amazing!
We had just recently painted our kitchen cabinets so it was time to give the laminate countertops an update, too! Check out the complete rundown on our small budget kitchen renovation.
DIY marble countertops will give your kitchen an updated modern look at a fraction of the cost. Let’s walk through the process of turning your countertops from UGH to WOW!
This post contains affiliate links for your shopping convenience. See my disclosure policy here.
Paint Faux Marble Countertops
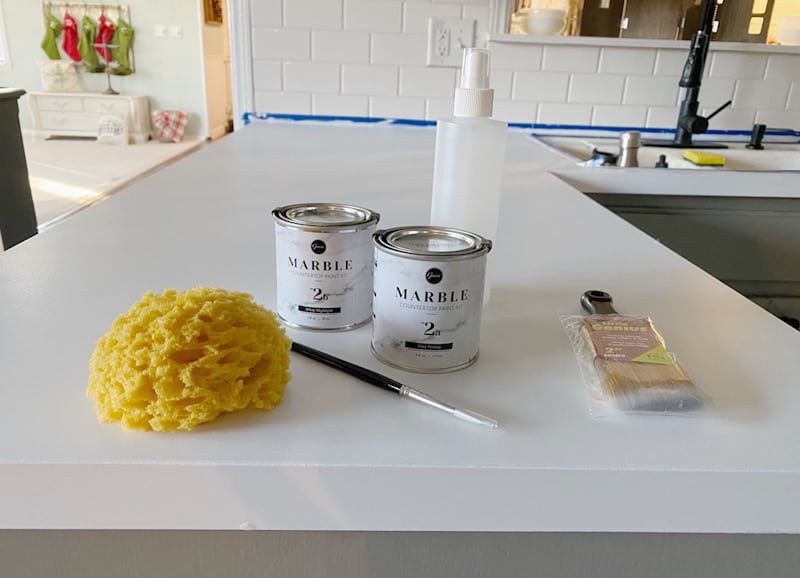
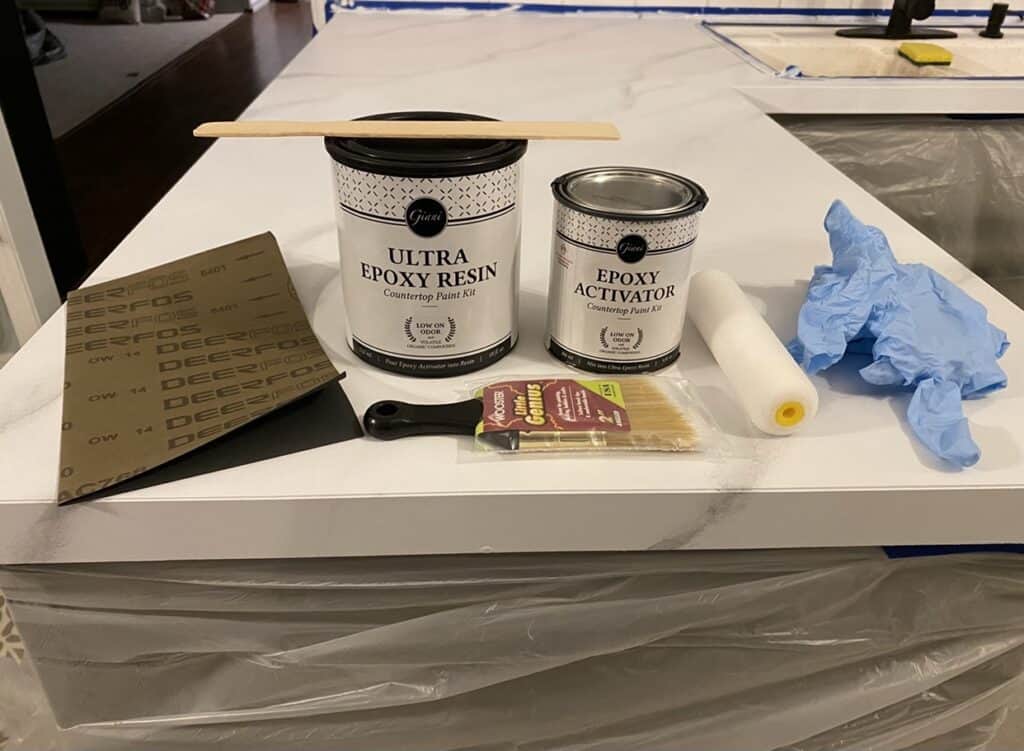
We used the Giani Marble Countertop Paint Kit and I loved that it had almost everything you needed to complete this project including paint brushes and rollers.
Here’s a list of all the supplies you’ll need:
- Giani Marble Countertop Paint Kit
- Blue painters tape
- Sponge (for cleaning)
- Lint-free cloth
- Small paint tray
- Paper towel roll
- Timer
- Clear or white caulk
Prep Countertop Surface
First you’ll want to prep the surface of your countertop by thoroughly cleaning it with a damp sponge.

If you use any kind of cleaner, make sure there isn’t any leftover residue and dry the countertop completely with a lint-free cloth so fibers don’t get into the primer as you start painting your marble countertops.
Using blue painter’s tape, tape off the areas around your sink, stovetop, backsplash, and anywhere else you don’t want the paint to seep onto.
Use the plastic sheets provided and attach them just below your countertops to cover and protect your cabinets and flooring.

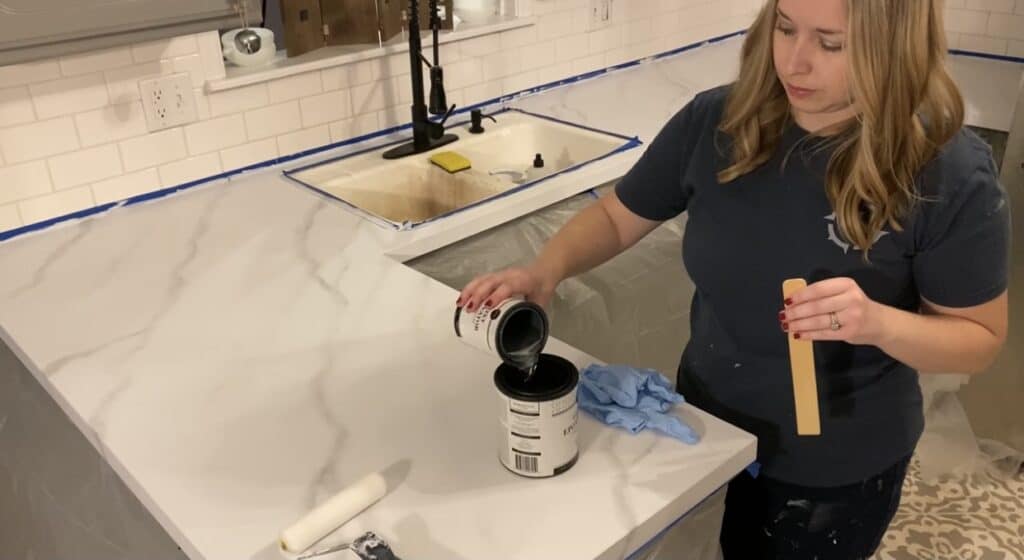
Prime Countertop Surface
Once the surface is clean and dry and you’ve taped everything off, you’re ready to prime!
You’ll need the white base primer, foam brush and standard roller (you’ll use the foam roller later) from the kit to get started!
Gently shake the can of primer then open and stir to make sure the contents are mixed well.
Pour the paint into the small paint tray. Working in 3 – 4 foot sections, apply a thin layer of the paint to the countertop. Try not to overlap the layers to ensure a smooth finish.
Use the foam brush along the edge where your countertop meets your backsplash (if applicable) and for any other hard to reach places. Don’t forget the edges of the countertop!
Allow the primer to dry for 4 hours before applying a second coat repeating the steps above. Once the second coat has been applied, allow it to dry for another 4 hours.
Research and Plan Your Faux Marble Countertops Veining
While you’re waiting for your primer to dry you can start researching what you’d like your countertops to look like so you can imitate the veining. Just Google “marble countertops” and find the pattern you like best for your faux marble countertops.
Giani recommended drawing a picture of your kitchen countertops and then drawing in your main veins. This is what mine looked like:
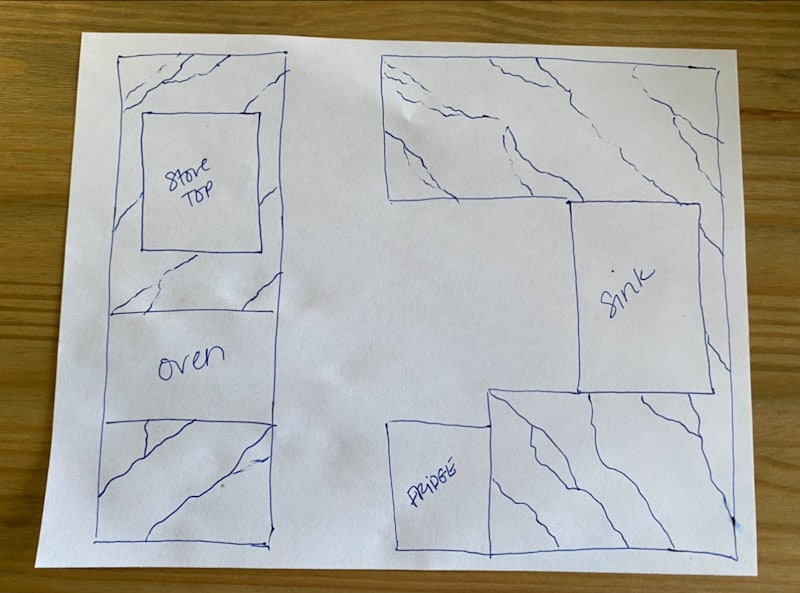
This process was really helpful – I followed the pattern I created as I went around painting my faux marble countertops.
It doesn’t have to be perfect and feel free to deviate from the plan as you go if needed, but it was helpful to have a guide. After drawing in the main veins you can go in and add where you would like more subtle veining.
Keep in mind that marble flows in the same direction so your veins shouldn’t criss cross. For a guide to different vein styles, refer to the instructions in the Giani marble kit.
I also highly recommend that you check out the video tutorial on Giani’s website – it’s super helpful! I’ve also included my own how-to video in the post for you!
Painting Veins, Shadows, and Highlights
Let’s paint those veins on your DIY marble countertop! You’ll need the grey paint, spray bottle, large and small paintbrushes, and paper towels for this part of the project.
I was worried about this part, but it was actually really fun! And if you mess up or don’t like how it’s going you can just spray it with water, wipe it off, and start fresh!
Take the small artist brush included in the kit and loosely hold it in your hand, allowing it to drag across the countertop. Marble has movement so allow your line to flow organically rather than straight for a natural, realistic look.
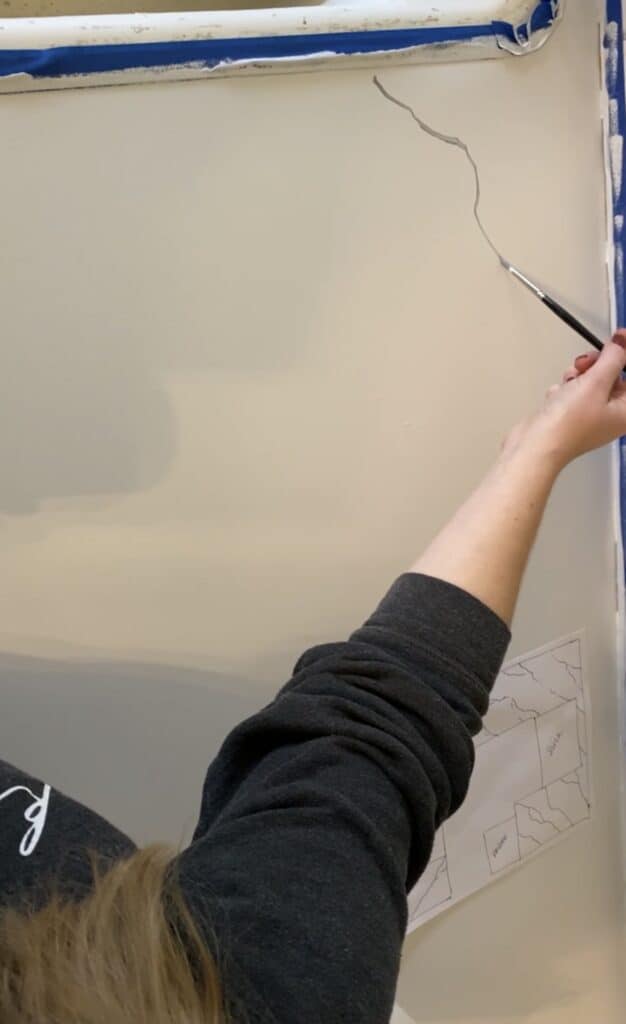
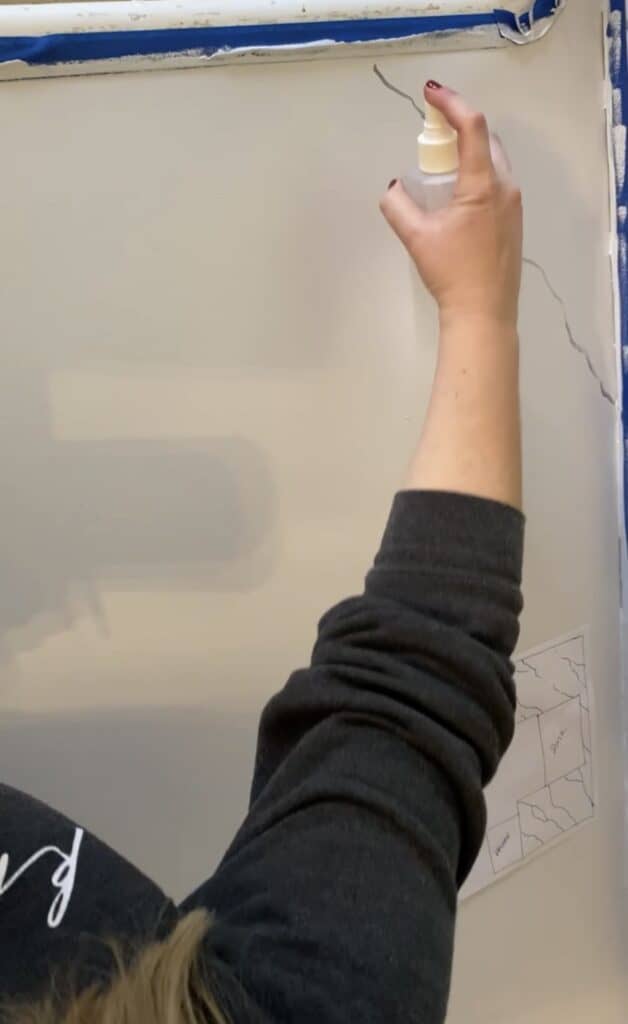
Work in one foot sections – the paint dries fast so you don’t want to do too much at one time.
After you’ve made the line, use mist from the spray bottle to dilute the paint. The more water you use, the lighter your vein will be. Use the larger paint brush to lightly feather out the paint.
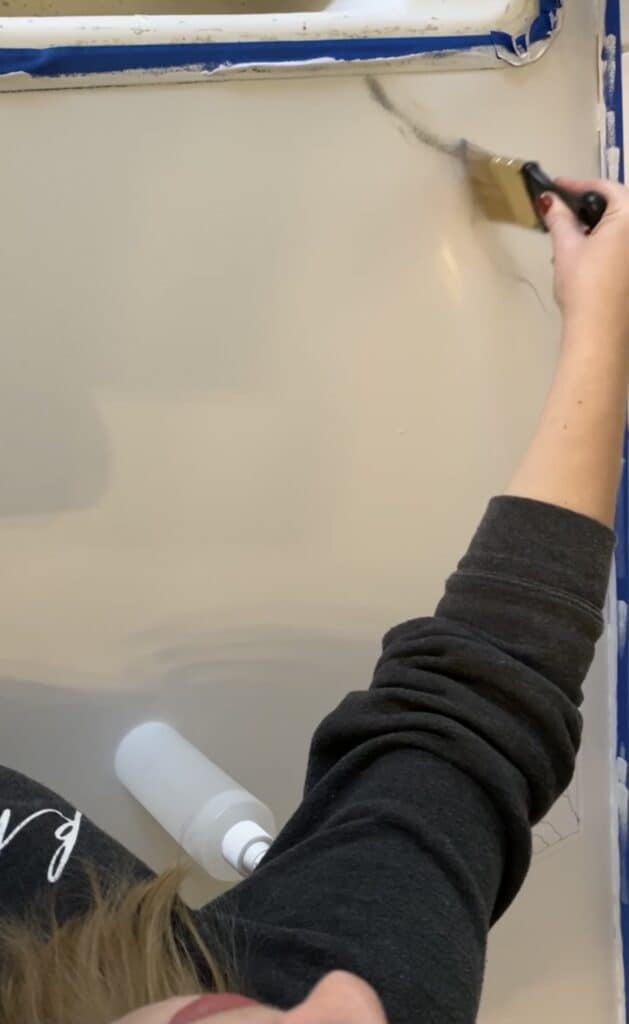
If you want a thinner vein you can use the brush to “push” the paint back in and manipulate the vein into the shape you desire. You can also lightly dab with a paper towel and use the brush to stipple for the desired outcome.
Again, make sure you check out my how-to video and the instructional video on the Giani site to watch this process in action – it will help!
Keep working in this way, stepping back every once in a while to get the big picture and make sure you like where the pattern is going.
For the edges, make sure the vein on top continues the natural flow down the side like an authentic marble slab.
Once the main veins on your DIY marble countertop are done, you’re ready for ghost veins! Ghost veins are just lighter veins that fill in the space. You can place them right next to a main vein to give a shadow effect or use them between main veins to add depth.
You’ll follow the same process you did with the main veins, but this time use more water to keep them light for a more faded look.
Once you’re happy with all of the veining on your DIY marble countertop, allow it to dry for an hour before apply the white highlights.
Use a small section of the sponge included in the kit with the white highlight paint provided to lightly dab the white in areas on or around your veins. This will add even more depth to your countertops and make them look authentic.
Allow everything to dry for 4 hours before moving on to the epoxy marble countertop topcoat.
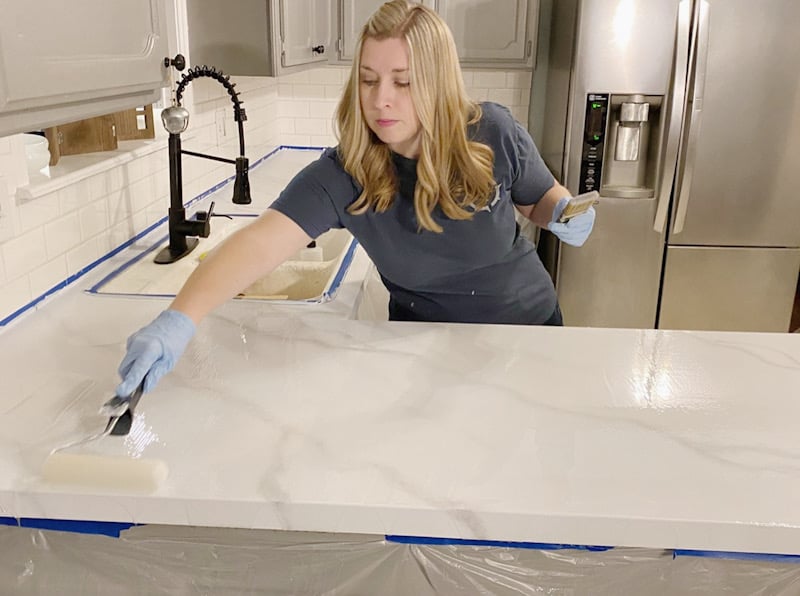
Epoxy Marble Countertop Topcoat
You’re almost there! It’s time to topcoat your beautiful countertops!
I really expected the topcoat to have a strong smell, so I was pleasantly surprised when it didn’t! It is zero VOC and low odor which is what you want for an indoor project!
The kit comes with three cans of epoxy activator and three cans of the ultra epoxy resin. You’ll also need the large paint brush, foam roller, and timer for this step.
Combine the epoxy activator with the ultra epoxy resin and set your timer for 3 minutes and 15 seconds (this is important!). Stir the contents together constantly until the timer goes off. Now it’s activated.
Make sure you only use one can of activator with one can of resin at a time. Don’t combine another set of cans until you’ve used all of the current one because once it’s been activated you only have 30 minutes to apply before it starts to set.
One set will cover a six-foot section. Slowly pour 2/3 of the can in three long streams in the section you’re working in. Use the foam roller to roll out the epoxy in a smooth layer.
Roll any excess epoxy off the edge of the countertop onto your plastic cover. Use your paint brush to smooth out the edges. With the leftover epoxy in the can, use your brush to get into any hard to reach corners the foam roller couldn’t reach.
Make sure to wipe drips off from underneath the DIY marble countertops so it doesn’t dry.
TIP: Place a piece of tape on the underside of the countertop to catch drips and then remove once the epoxy has begun to set.
Once you’ve finished the first section, throw away the can of epoxy topcoat and repeat the steps above to activate and apply the topcoat to the next section of the countertop until finished.
Once the epoxy has been applied to the entire surface, allow it to dry 1 – 2 hours before carefully removing all the tape and plastic from the DIY marble countertops so it doesn’t dry to the surface.
Allow the countertop to dry for 24 hours before caulking around your sink and other areas as needed. You can also run your dishwasher.
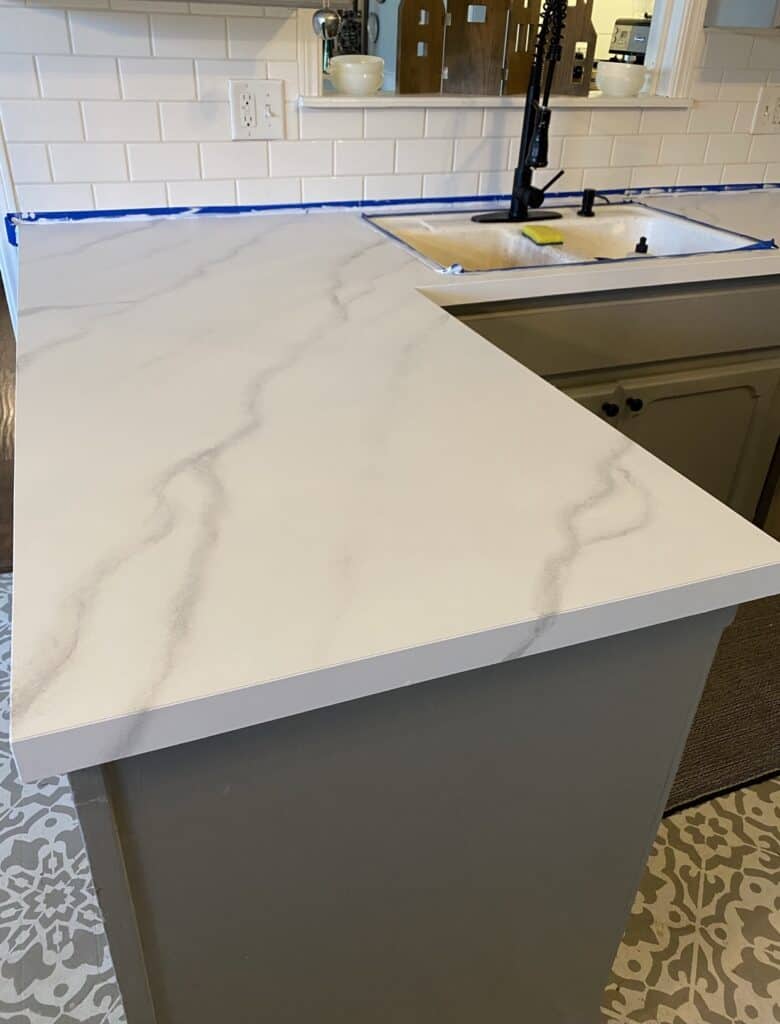
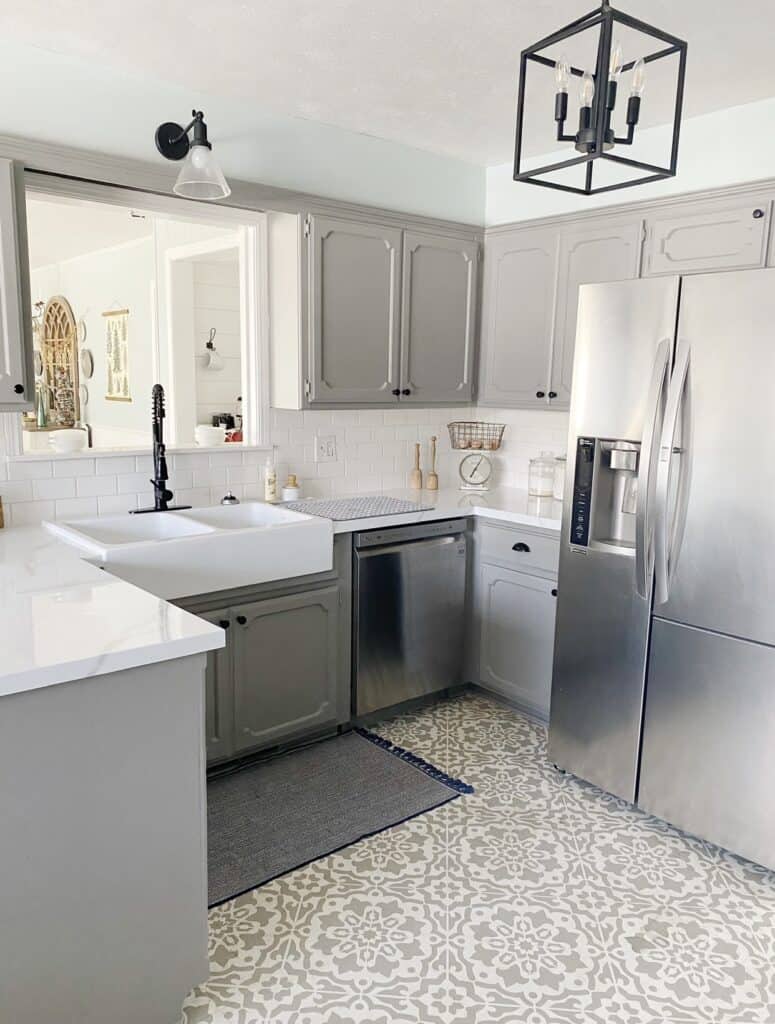
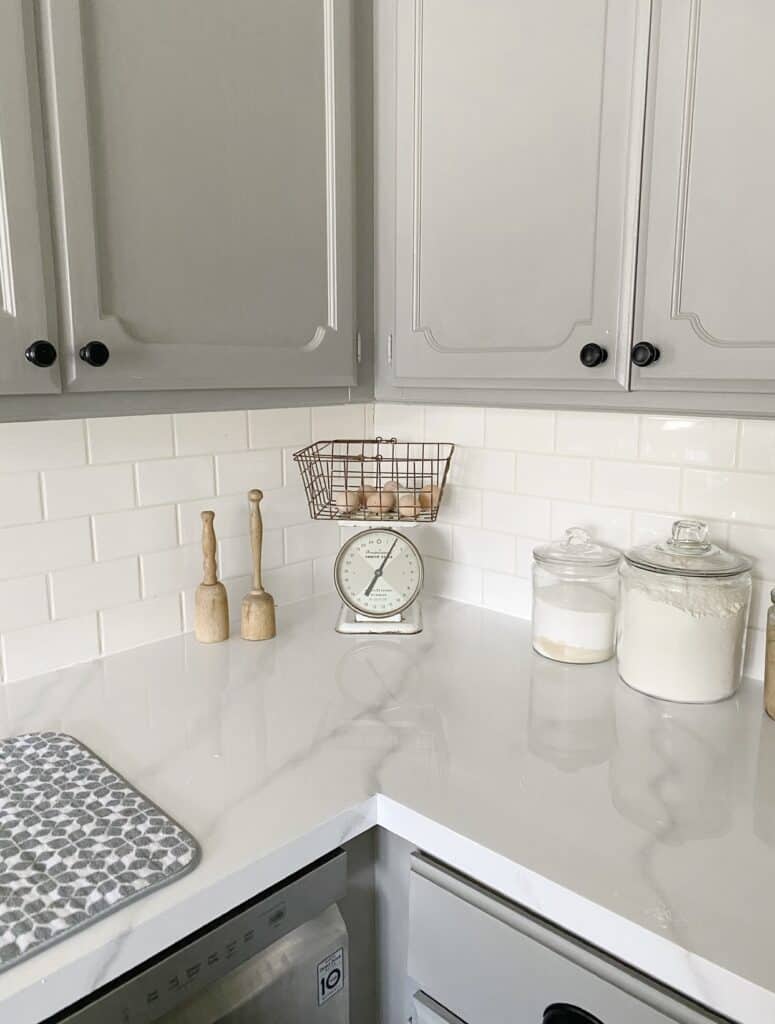
You can use the DIY marble countertop lightly after 2 days, but it will take a full 7 days to completely cure. Now you’re ready to enjoy your beautiful new DIY marble countertop! I love the pretty shine the epoxy topcoat adds!
Caring for Your DIY Marble Countertop
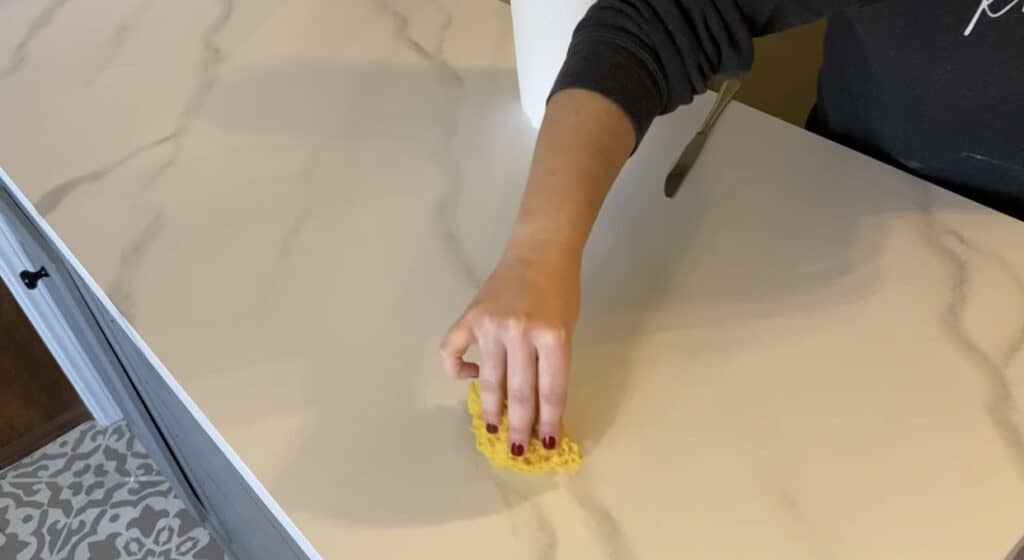
For the most part, a damp sponge or mild soaps will clean your diy faux marble countertop perfectly. The instructions say NOT to use harsh cleaners or products like Magic Eraser.
That said, I had a really bad yellow stain on my countertop that I couldn’t get off with just water or mild soap so I did use my Magic Eraser and it came right off. So if you have a tough spot you might be able to use this method sparingly.
We’ve had our DIY marble countertops for over a year now and not only do they look amazing, but they are holding up perfectly!
Faux Marble Countertop FAQs
What is faux marble countertops?
Faux marble countertops use the pattern of authentic marble to make them look like the real deal. Laminate countertops offer a faux marble look and you can also use an epoxy marble kit to give your current countertops a marble look.
What is a cheaper alternative to marble countertops?
Granite and quartz are both more affordable options compared to marble. Corian is another option, as well as Formica.
How long do faux marble countertops last?
If you choose laminate faux marble, your countertop can last up to 15 years. If you’re using an epoxy kit like Giani, with the right care they can last 5-6 years.
Does faux marble scratch easily?
Like most countertops, you want to be careful to use a cutting board when cutting food and not use a knife directly on the countertop. This will help keep your countertop from scratching.
With Giani, the epoxy topcoat dries to a hard finish and protects the faux marble from scratching.
How much does faux marble cost?
The Giani Carrara White Marble Epoxy Countertop Kit is currently around $200 on Amazon. One kit was enough for our kitchen, but be sure and measure your countertops to be sure. You can find affordable laminate faux marble at your local hardware store!